CTobias
Professional BS'r
Here is a watered down step by step for tying a married wing. I am sure I will leave some things out, so if you have a question just ask. Also I will apologize in advance for the crappy pics. I used my phone to do this step by step. I spent all my money on fishing gear.
The materials I used should be recognizable and I didn't use anything fancy besides the jungle cock. Also, this is one of he flies going into the fly wallet for the steelhead bash raffle.
First step when tying with a blind eye hook, is tying in the eye. I chose to use 30lb Dacron backing.
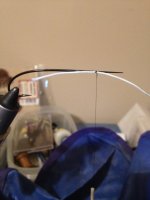
I wrap a good bit forward and then create the eye by tying in the opposite side. Make sure you keep everything as uniform as possible. If it gets lumpy the fly body can look weird.
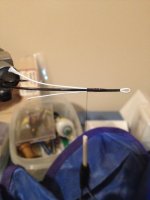
Once I have the eye tied in I work towards the bend of the hook to tie in the tag.
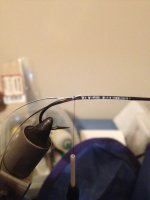
Again, tie in the material neat and uniform. I wrap thread all the way to the point I am going to start the tinsel at. I wrap my flat tinsel forward and them follow it with the oval tinsel and tie it off.
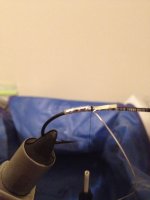
Next is tying in the tail. I like my golden crest tails to go to the bend of the hook. With other materials I will use a longer tail that I think looks good.
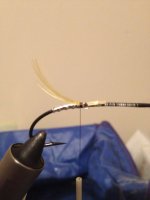
I used a bit of golden pheasant tips as well for the tail.
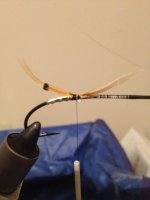
Next I used some peacock for a section wrap.
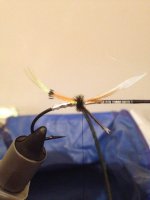
I used olive floss and oval tinsel for the body. I do two layers of floss and spin the floss counter clockwise to flatten it out so you can get a more even body.
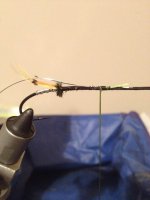
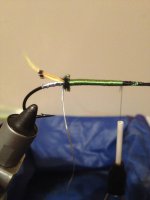
Once your done with the floss and satisfied, wrap your oval tinsel forward.
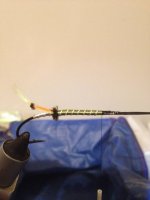
Next I used some olive guinea pieces to church up the fly a bit as well as another peacock herl for a section wrap. I usually do three to four wraps with the peacock. You can also use ostrich for the section wraps.
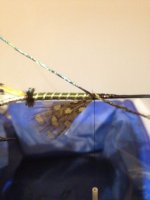
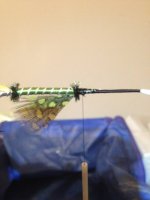
Next you will tie in the hackle for the body. I used olive schlappen and ribbed it with oval tinsel again. I strip one side of the feather so the fly looks cleaner.
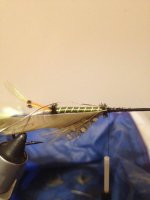
Then I used black sts trilobal dubbing for the rest of he body. I used a dubbing loop to keep he body as uniform as possible.
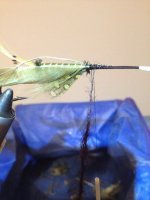
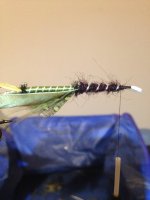
Wrap your hackle after you secure the tinsel.
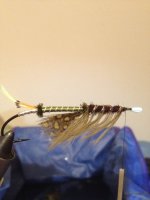
Once you get towards the head, you want to use the least amount of wraps as possible so you can control your slop.
I chose an olive hackle underwing for the fly. One thing I do is flatten the stems of the hackle with pliers. This will make it so the hackle doesn't want to roll when you tie it in. I also create a z with the stem so the hackle will lay flatter against the hook shank.
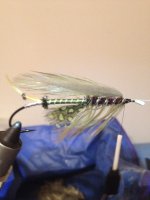
Next is the hardest part and most time consuming. Creating your wing and tying it in. There are no rules as to the pattern of the wing. It is all up to you. I try to have my wings as big as the hook gap, but you can make them as you see fit.
After I have selected my colors I cut the amount I will need for both wings. I used all turkey for these wings, but you can marry all types of wing feathers.
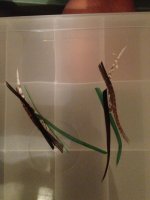
As you're building the wing make sure you are extending the next set of fibers a little past the bottom piece so you can build a good looking wing. Before I go further I have to say that you can only use fibers with the side of the feather you cut them from. While looking at the dull side of the feather you will only be able to use feathers cut from the left side of the stem with other fibers from the left side of the stem on another feather on the dull side. The feathers are like Velcro and will stick together, you can cause the feather fiber to not stick together if you handle the fibers roughly.
Ok. Back on topic. Once you get your pattern down build the rest of the wing.
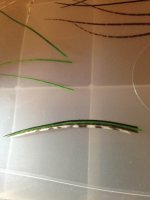
Once you get both wings done you are ready to set the wings on the fly.
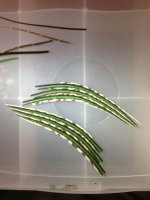
First determine where you want your wings to end. I try and end my wings right before the tail of the fly. make sure the wings are equal and are over the top of your under wing if you chose to use one.
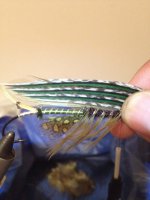
Next grasp the wings with your non tying hand and get a death pinch on the wings.
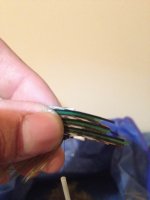
When you go to set he wings you will do one complete loose wrap and as you are pulling straight up to begin your second wrap keep going up to set the wings. You should feel all the feather fibers compressing in your finger tips. You will want to keep your death pinch until the wings are Set and you Have made three or four wraps to secure the wings. Don't pull so hard you break your thread either! Wankers.
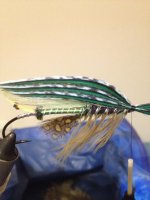
Next add all your fancy head dressings. I used more guinea, jungle cock nail, and a peacock herl head.
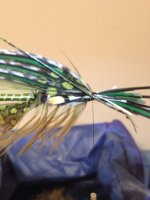
Then whip finish and add some glue.
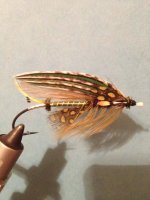
Hope this helps some of you. Thanks for looking!
The materials I used should be recognizable and I didn't use anything fancy besides the jungle cock. Also, this is one of he flies going into the fly wallet for the steelhead bash raffle.
First step when tying with a blind eye hook, is tying in the eye. I chose to use 30lb Dacron backing.

I wrap a good bit forward and then create the eye by tying in the opposite side. Make sure you keep everything as uniform as possible. If it gets lumpy the fly body can look weird.

Once I have the eye tied in I work towards the bend of the hook to tie in the tag.

Again, tie in the material neat and uniform. I wrap thread all the way to the point I am going to start the tinsel at. I wrap my flat tinsel forward and them follow it with the oval tinsel and tie it off.

Next is tying in the tail. I like my golden crest tails to go to the bend of the hook. With other materials I will use a longer tail that I think looks good.

I used a bit of golden pheasant tips as well for the tail.

Next I used some peacock for a section wrap.

I used olive floss and oval tinsel for the body. I do two layers of floss and spin the floss counter clockwise to flatten it out so you can get a more even body.


Once your done with the floss and satisfied, wrap your oval tinsel forward.

Next I used some olive guinea pieces to church up the fly a bit as well as another peacock herl for a section wrap. I usually do three to four wraps with the peacock. You can also use ostrich for the section wraps.


Next you will tie in the hackle for the body. I used olive schlappen and ribbed it with oval tinsel again. I strip one side of the feather so the fly looks cleaner.

Then I used black sts trilobal dubbing for the rest of he body. I used a dubbing loop to keep he body as uniform as possible.


Wrap your hackle after you secure the tinsel.

Once you get towards the head, you want to use the least amount of wraps as possible so you can control your slop.
I chose an olive hackle underwing for the fly. One thing I do is flatten the stems of the hackle with pliers. This will make it so the hackle doesn't want to roll when you tie it in. I also create a z with the stem so the hackle will lay flatter against the hook shank.

Next is the hardest part and most time consuming. Creating your wing and tying it in. There are no rules as to the pattern of the wing. It is all up to you. I try to have my wings as big as the hook gap, but you can make them as you see fit.
After I have selected my colors I cut the amount I will need for both wings. I used all turkey for these wings, but you can marry all types of wing feathers.

As you're building the wing make sure you are extending the next set of fibers a little past the bottom piece so you can build a good looking wing. Before I go further I have to say that you can only use fibers with the side of the feather you cut them from. While looking at the dull side of the feather you will only be able to use feathers cut from the left side of the stem with other fibers from the left side of the stem on another feather on the dull side. The feathers are like Velcro and will stick together, you can cause the feather fiber to not stick together if you handle the fibers roughly.
Ok. Back on topic. Once you get your pattern down build the rest of the wing.

Once you get both wings done you are ready to set the wings on the fly.

First determine where you want your wings to end. I try and end my wings right before the tail of the fly. make sure the wings are equal and are over the top of your under wing if you chose to use one.

Next grasp the wings with your non tying hand and get a death pinch on the wings.

When you go to set he wings you will do one complete loose wrap and as you are pulling straight up to begin your second wrap keep going up to set the wings. You should feel all the feather fibers compressing in your finger tips. You will want to keep your death pinch until the wings are Set and you Have made three or four wraps to secure the wings. Don't pull so hard you break your thread either! Wankers.

Next add all your fancy head dressings. I used more guinea, jungle cock nail, and a peacock herl head.

Then whip finish and add some glue.

Hope this helps some of you. Thanks for looking!
Last edited:
